Делаем страницу на React с базой сотрудников при помощи Airtable и Quarkly
- понедельник, 1 февраля 2021 г. в 00:30:10
Слышали про такой инструмент, как Airtable, но не знали, с чего начать? Тогда приглашаем в мир визуального программирования построения БД!
Этим постом мы начинаем цикл обучающих статей, в которых будем давать практические примеры работы с нашим инструментом Quarkly. В этом уроке мы сделаем простое веб-приложение, которое будет показывать сотрудников компании. При создании приложения ни один сотрудник РЖД не пострадал.
Фронт будем делать при помощи Quarkly, а данные подтягивать из базы в Airtable. На выходе получим react-приложение, синхронизированное с базой данных.
Airtable — популярный no-code инструмент, в котором вы можете делать свои базы данных большого объема. Выглядят они как таблицы, но имеют гораздо более мощный функционал. В частности, для нашего урока выбор Airtable обусловлен легким способом передачи данных по API.
Если вы впервые слышите про Airtable, перед началом работы не будет лишним почитать официальное руководство на сайте компании. Также советуем не стесняться и задавать вопросы в чатике Airtable Chat & Community в телеграм.
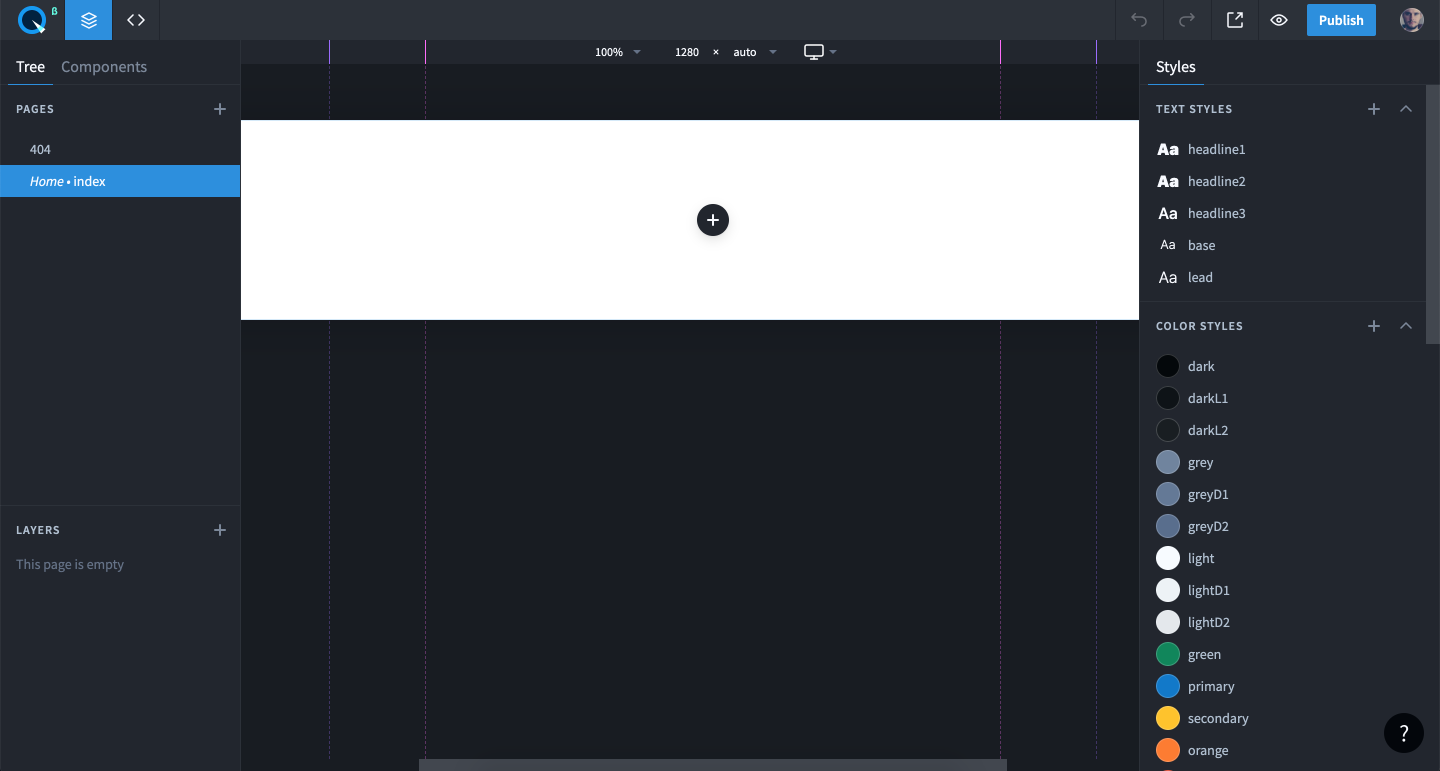
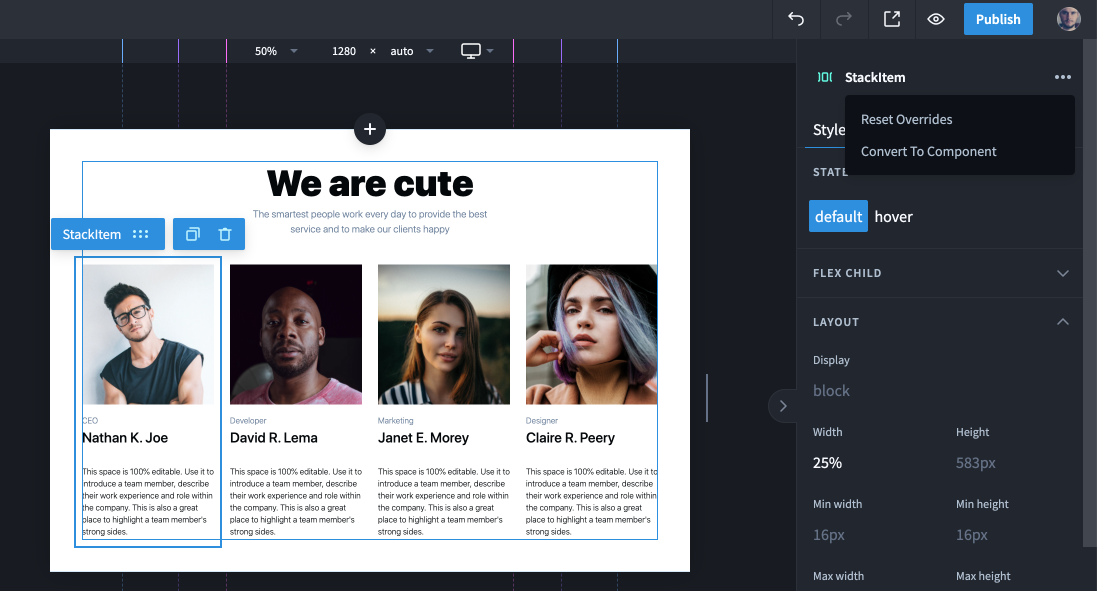
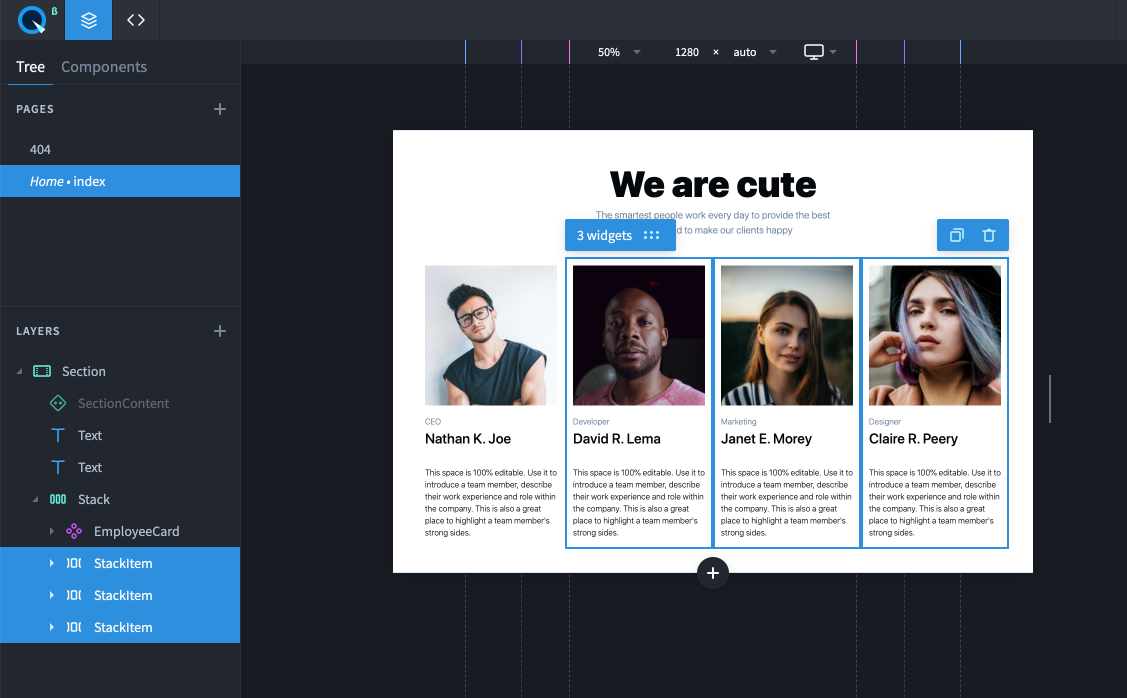
Фронтендная часть работ будет сделана в Quarkly, и для этого мы будем использовать всего два компонента:
Для тех, у кого нет времени вникать в пост в печатном формате, мы подготовили видео с субтитрами и таймкодами:
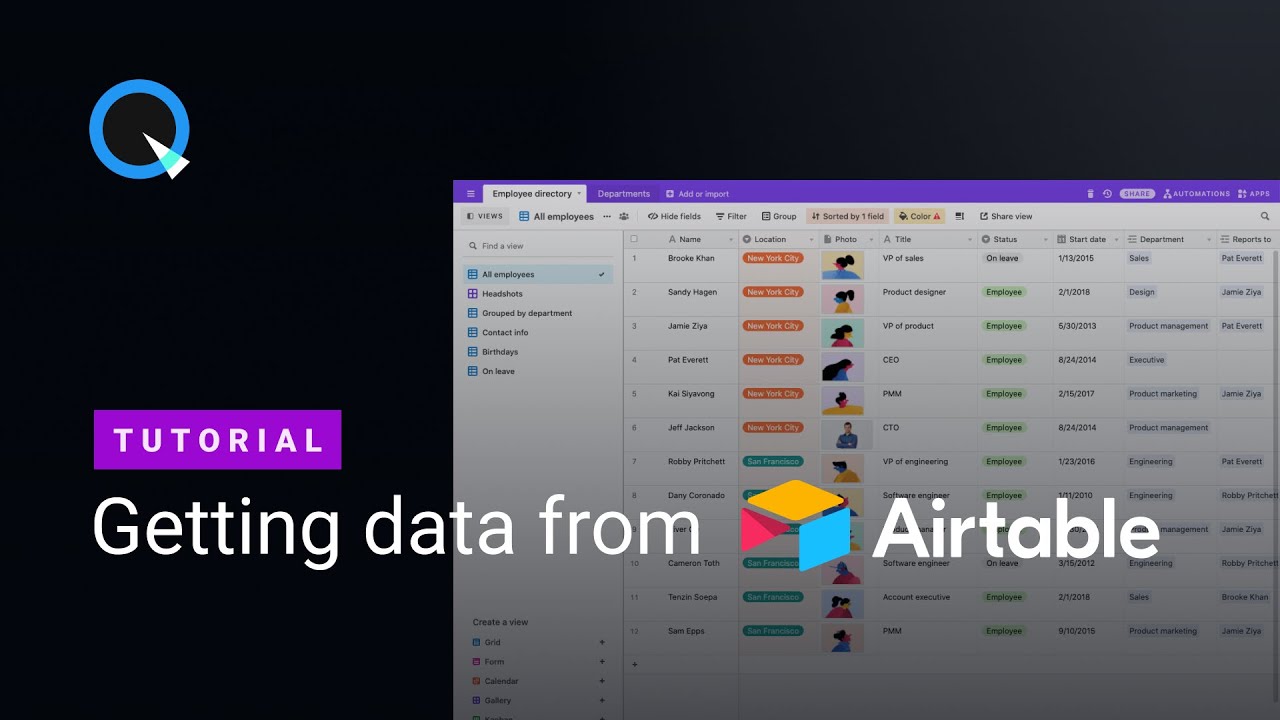

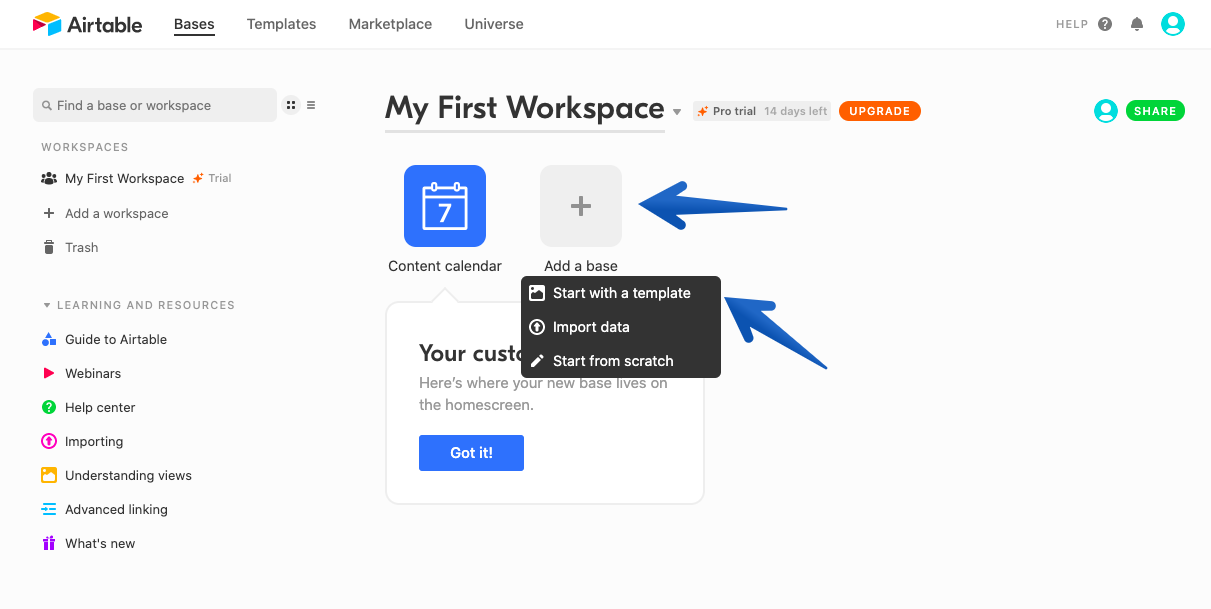
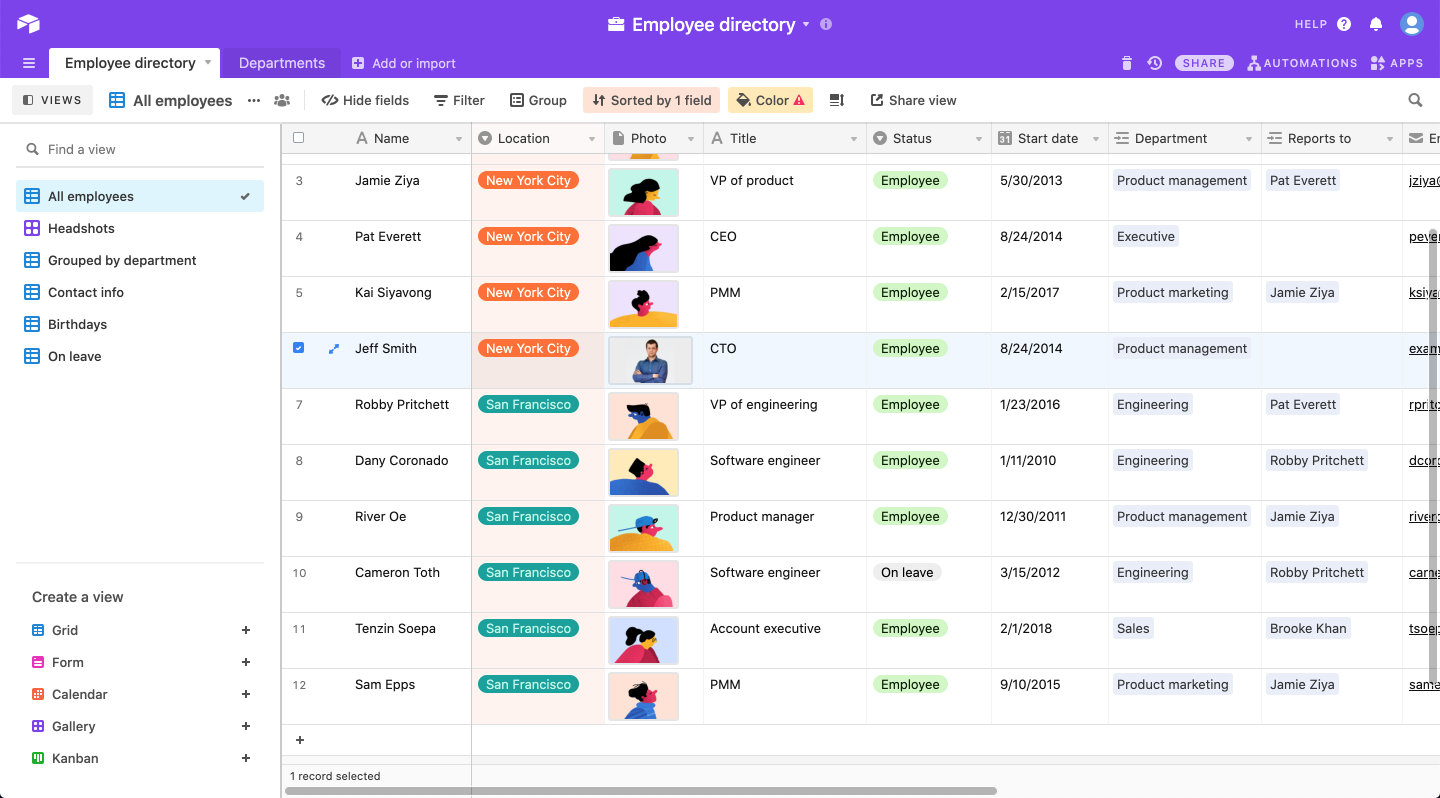
Переходим на сайт Airtable и регистрируемся/авторизуемся.
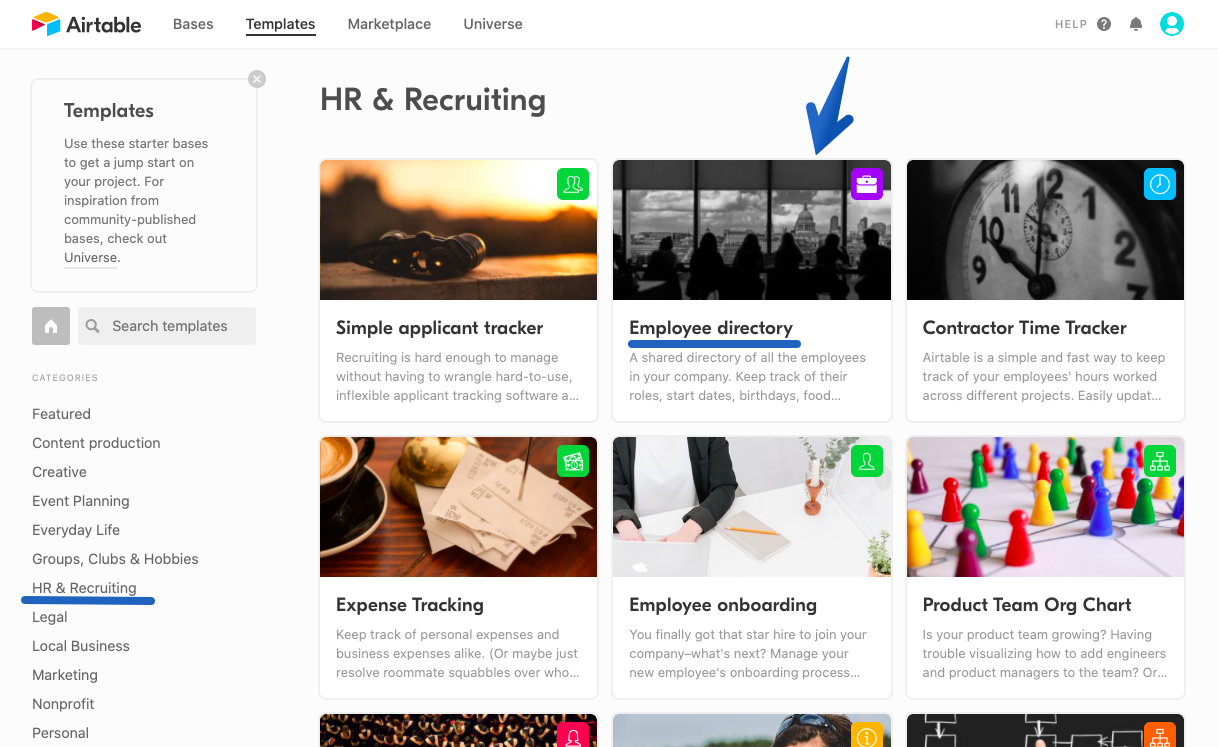
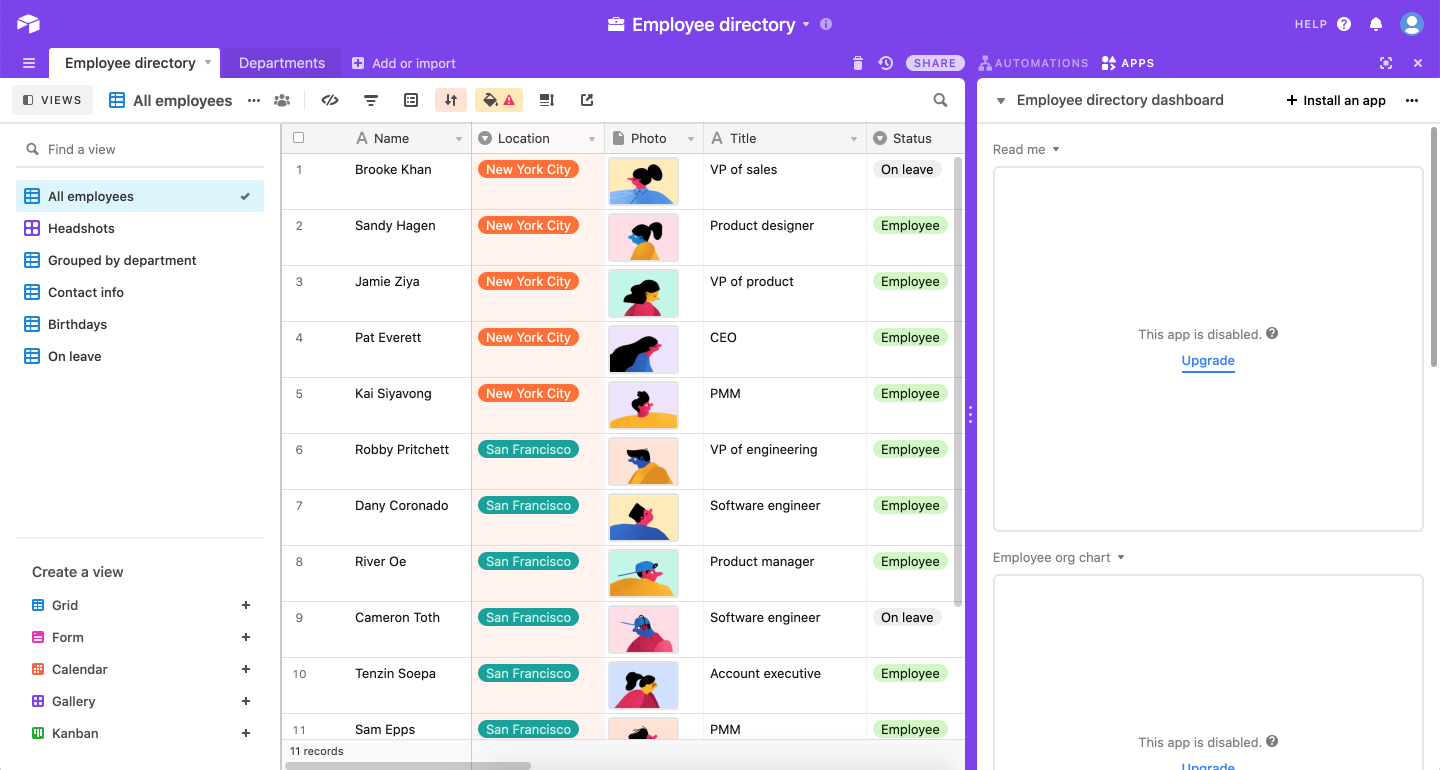
На данном этапе здесь мы ничего менять не будем, в текущем виде база уже нас устраивает.
Изначально Airtable интересен для нас именно за счет удобного API. При этом, что немаловажно, возможность забирать данные и отправлять их в нашу базу Airtable предоставляет бесплатно.

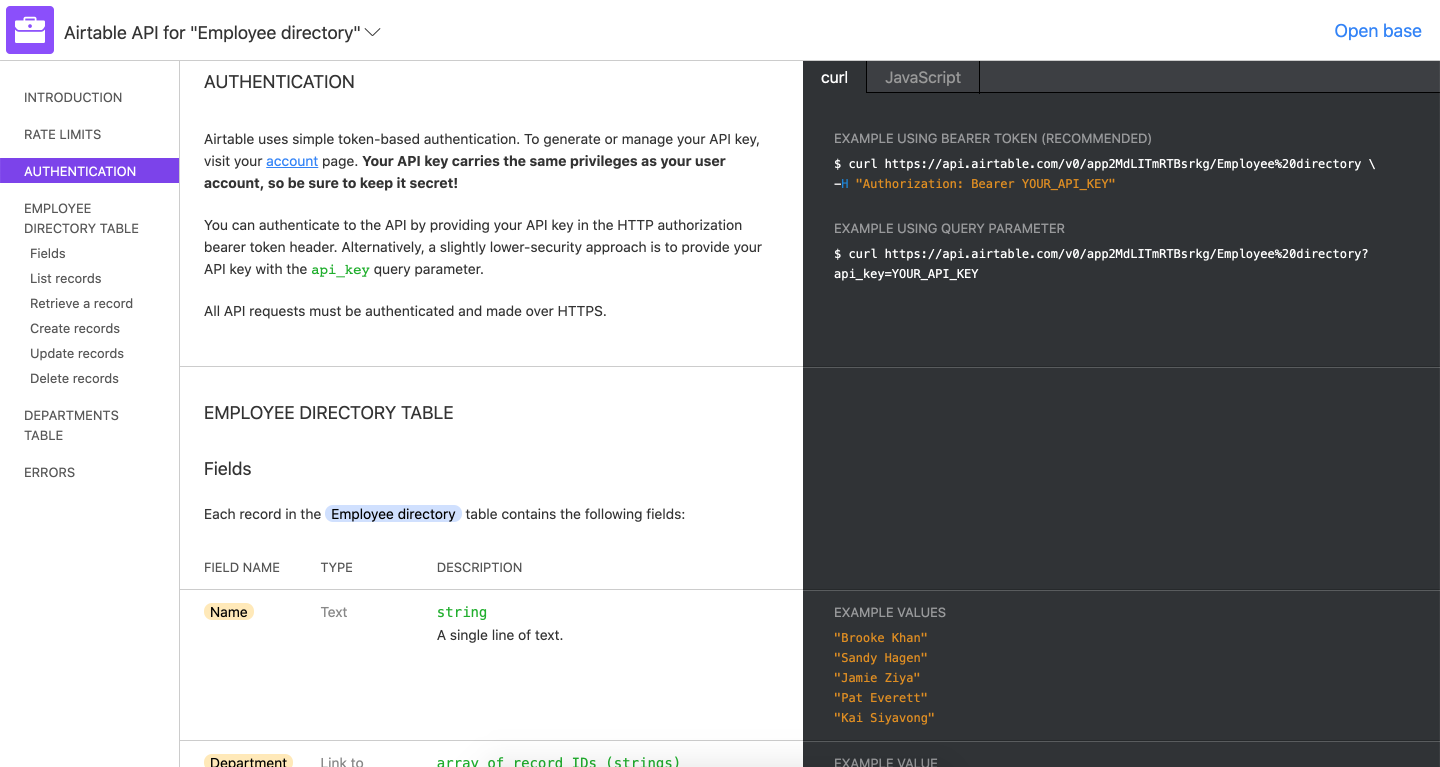
$ curl https://api.airtable.com/v0/app2MdLITmRTBsrkg/Employee%20directory \

-H "Authorization: Bearer YOUR_API_KEY"

На этом этапе мы добавим в компонент EmployeeTable код, который будет забирать данные из API.

import React from "react";import React, { useEffect, useState } from "react";import EmployeeCard from "./EmployeeCard";const EmployeeTable = props => {
const {
children,
rest
} = useOverrides(props, overrides, defaultProps);const EmployeeTable = props => {
const {
override,
rest
} = useOverrides(props, overrides, defaultProps);const [employees, setEmployees] = useState([]);useEffect(() => {
fetch("https://api.airtable.com/v0/appWw7KBKSc9bPjZE/Employee%20directory?view=All%20employees", {
headers: {
'Authorization': 'Bearer YOUR_API_KEY'
}
})
.then(response => response.json())
.then(data => setEmployees(data.records.map(({ fields }) => fields)));
}, []);return <Stack {...rest}>
{children}
</Stack>;
};return <Stack {...rest}>
{
employees.map(employee => <EmployeeCard {...override("employeeCard")} employee={employee} />)
}
</Stack>;
};import React, { useEffect, useState } from "react";
import { useOverrides, Stack } from "@quarkly/components";
import EmployeeCard from "./EmployeeCard";
const defaultProps = {
"margin-top": "40px"
};
const overrides = {};
const EmployeeTable = props => {
	const {
		override,
		rest
	} = useOverrides(props, overrides, defaultProps);
const [employees, setEmployees] = useState([]);
useEffect(() => {
			fetch("https://api.airtable.com/v0/appWw7KBKSc9bPjZE/Employee%20directory?view=All%20employees", {
				headers: {
					'Authorization': 'Bearer YOUR_API_KEY'
				}
			})
			.then(response => response.json())
			.then(data => setEmployees(data.records.map(({ fields }) => fields)));
	}, []);
return <Stack {...rest}>
		{
			employees.map(employee => <EmployeeCard  {...override("employeeCard")}  employee={employee} />)
		}
	</Stack>;
};
Object.assign(EmployeeTable, {
...Stack,
defaultProps,
overrides
});
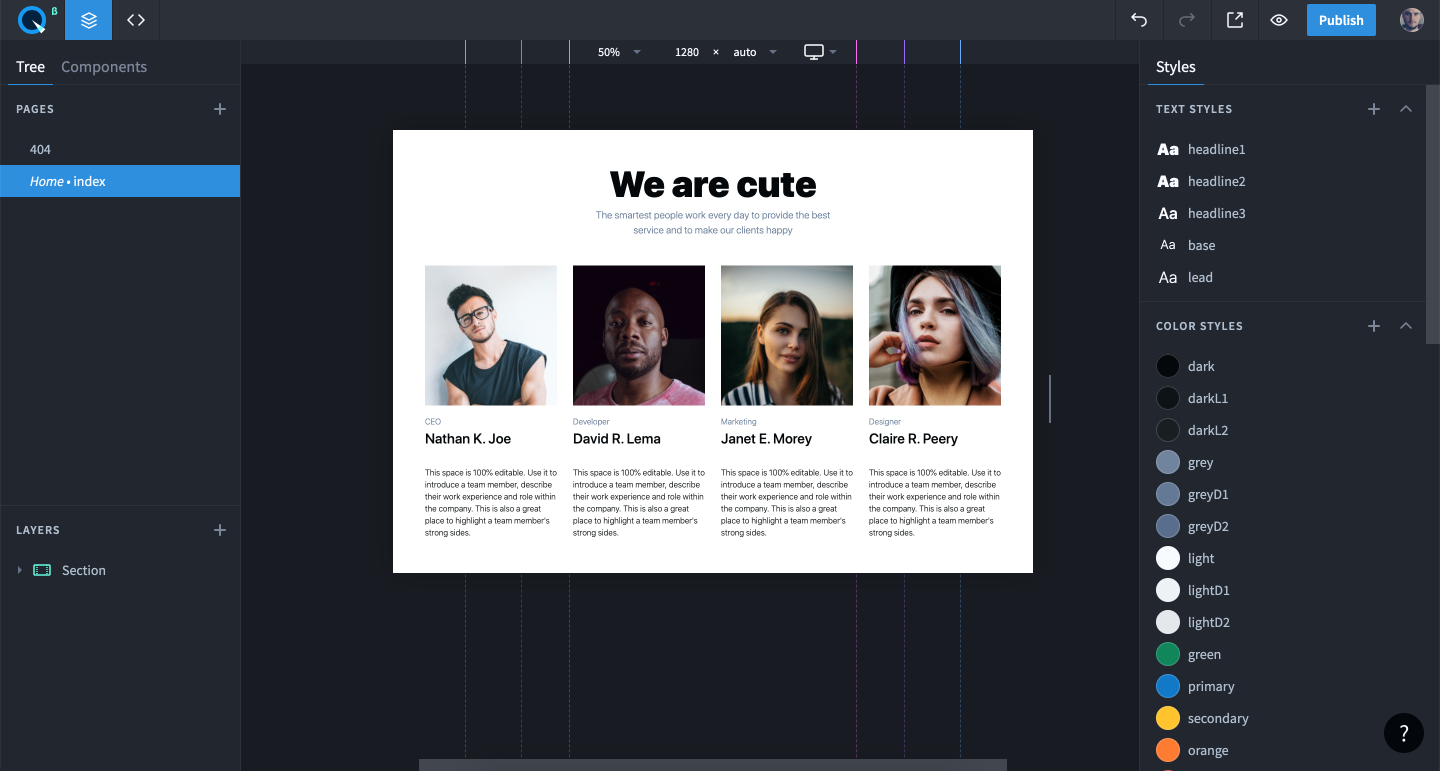
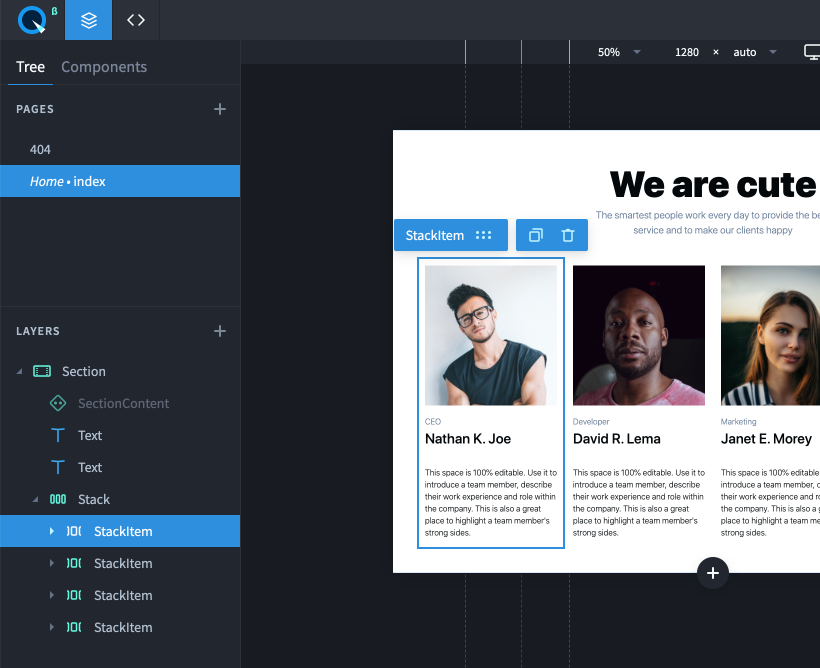
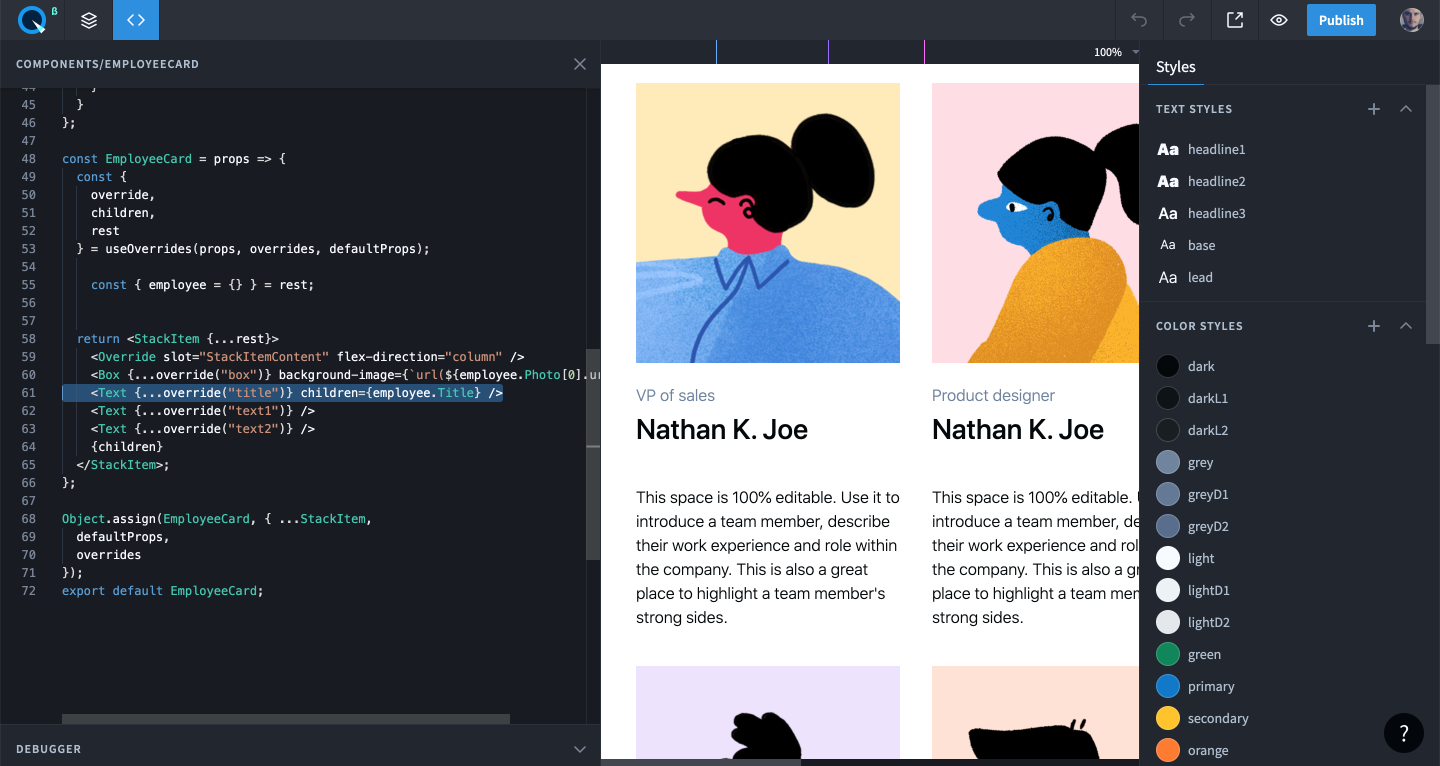
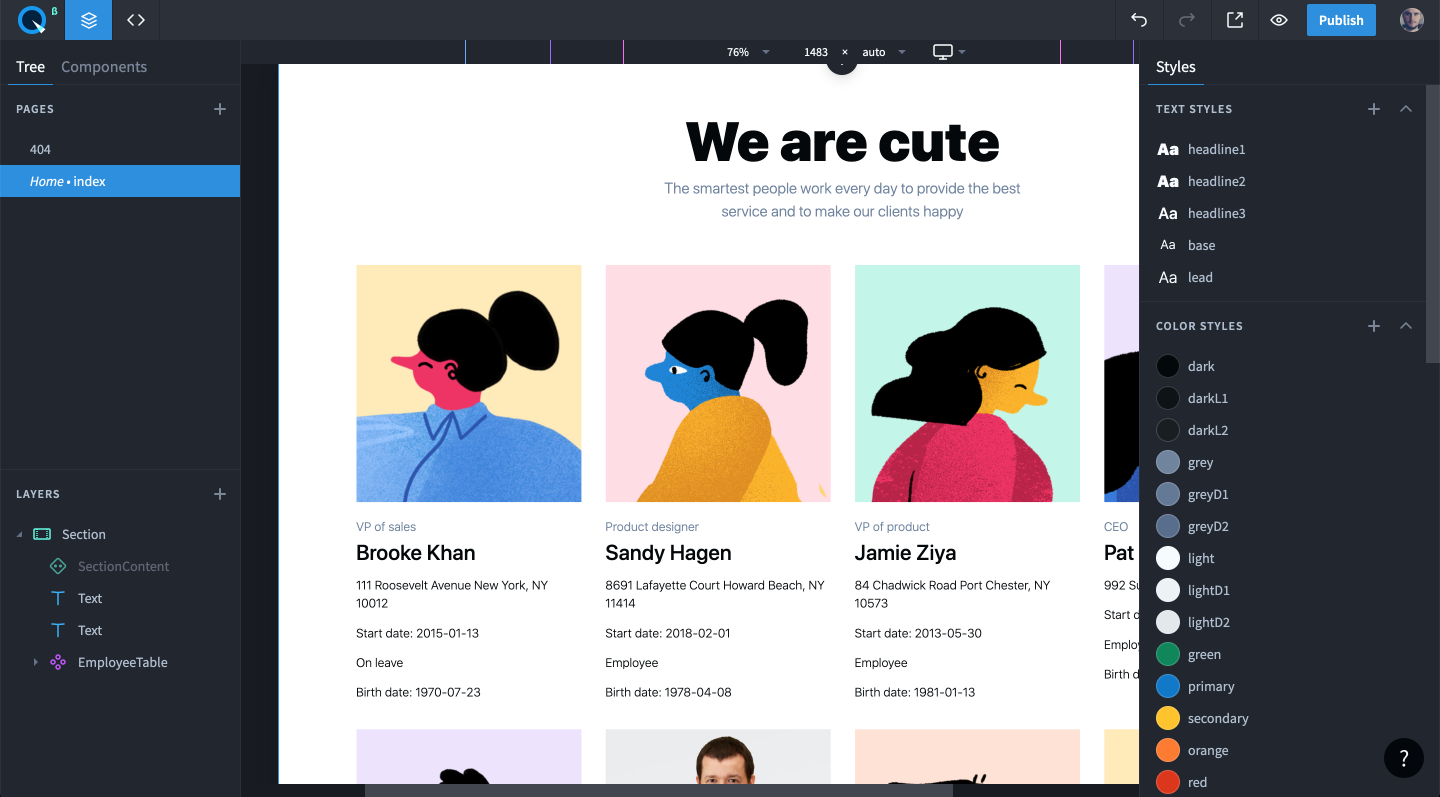
export default EmployeeTable;Готово! Теперь мы получаем данные от Airtable, помещаем их в employees и проходимся по нему методом map. На каждую запись в employees мы создаем <EmployeeCard/>, в который передаем как пропс конкретные данные.
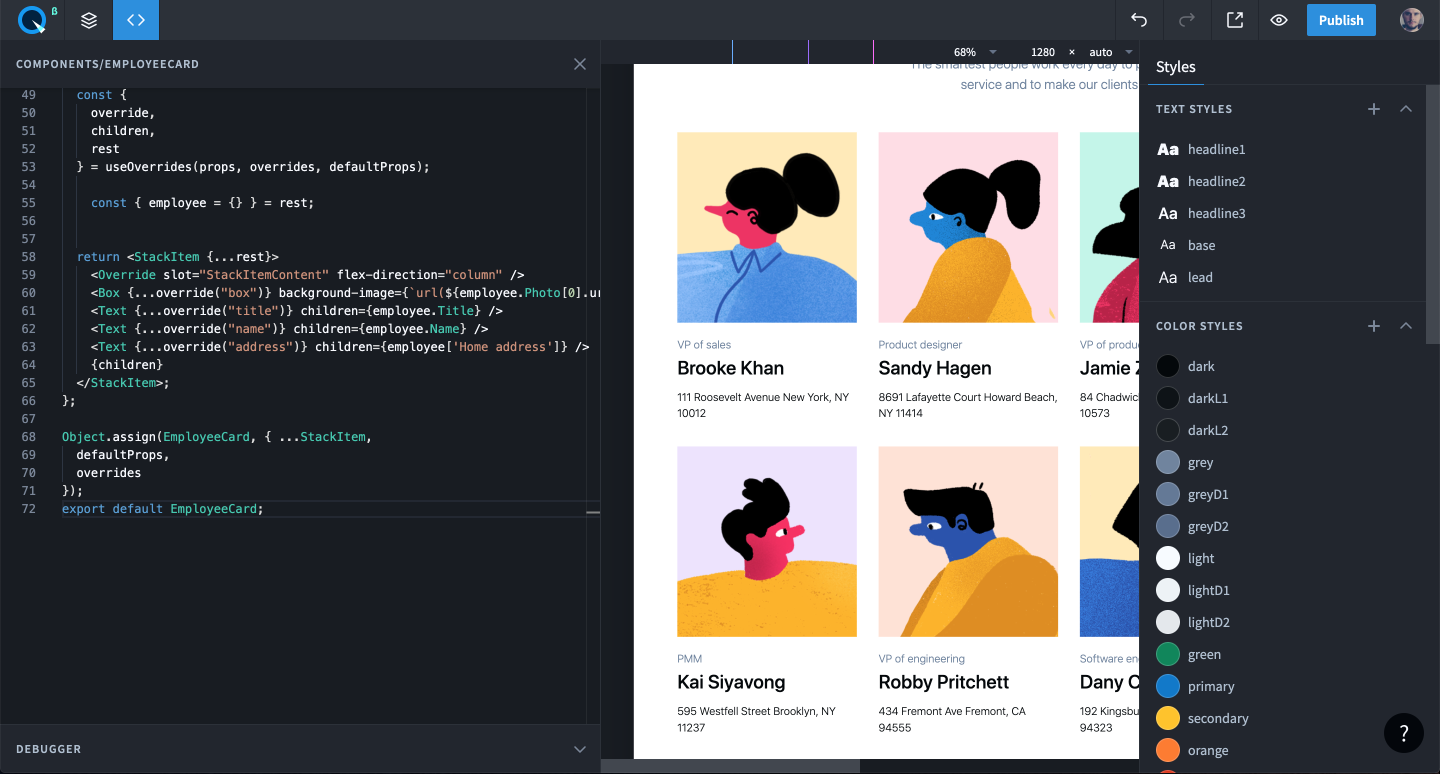
Осталось научить EmpolyeeCard принимать эти данные и показывать их в нужном месте.
Здесь мы научим карточку сотрудника принимать данные и показывать их.
import React from "react";
import { useOverrides, Override, StackItem } from "@quarkly/components";
import { Box, Text } from "@quarkly/widgets";
const defaultProps = {
	"width": "25%",
	"lg-width": "50%",
	"sm-width": "100%"
};
const overrides = {
	"box": {
		"kind": "Box",
		"props": {
			"height": "0",
			"margin": "0 0 20px 0",
			"padding-bottom": "100%",
			"background": "url(https://images.unsplash.com/photo-1503443207922-dff7d543fd0e?ixlib=rb-1.2.1&ixid=eyJhcHBfaWQiOjEyMDd9&auto=format&fit=crop&w=582&q=80) 50% 0/cover no-repeat"
		}
	},
	"text": {
		"kind": "Text",
		"props": {
			"color": "--grey",
			"margin": "0",
			"children": "CEO"
		}
	},
	"text1": {
		"kind": "Text",
		"props": {
			"as": "h3",
			"font": "--headline3",
			"margin": "5px 0 20px 0",
			"children": "Nathan K. Joe"
		}
	},
	"text2": {
		"kind": "Text",
		"props": {
			"as": "p",
			"margin": "20px 0 5px 0",
			"children": "This space is 100% editable. Use it to introduce a team member, describe their work experience and role within the company. This is also a great place to highlight a team member's strong sides."
		}
	}
};

const EmployeeCard = props => {
	const {
		override,
		children,
		rest
	} = useOverrides(props, overrides, defaultProps);
	return <StackItem {...rest}>
		<Override slot="StackItemContent" flex-direction="column" />
		<Box {...override("box")} />
		<Text {...override("text")} />
		<Text {...override("text1")} />
		<Text {...override("text2")} />
		{children}
	</StackItem>;
};

Object.assign(EmployeeCard, { ...StackItem,
	defaultProps,
	overrides
});
export default EmployeeCard;} = useOverrides(props, overrides, defaultProps);const { employee = {} } = rest;<Box {...override("box")} /><Box {...override("box")} background-image={`url(${employee.Photo && employee.Photo[0] && employee.Photo[0].url})`}/>"background": "url(https://images.unsplash.com/photo-1503443207922-dff7d543fd0e?ixlib=rb-1.2.1&ixid=eyJhcHBfaWQiOjEyMDd9&auto=format&fit=crop&w=582&q=80) 50% 0/cover no-repeat""background-size": "cover",
"background-position": "center",
"background-image": "url(https://images.unsplash.com/photo-1503443207922-dff7d543fd0e?ixlib=rb-1.2.1&ixid=eyJhcHBfaWQiOjEyMDd9&auto=format&fit=crop&w=582&q=80) 50% 0/cover no-repeat"
<Text {...override("text")} /><Text {...override("title")} children={employee.Title} />"text": {
"kind": "Text",
"props": {
"color": "--grey",
"margin": "0",
"children": "CEO"
}
},"title": {
"kind": "Text",
"props": {
"color": "--grey",
"margin": "0",
"children": "Title"
}
},
<Text {...override("text1")} />
<Text {...override("text2")} /><Text {...override("name")} children={employee.Name} />
<Text {...override("address")} children={employee['Home address']} />"text1": {
"kind": "Text",
"props": {
"as": "h3",
"font": "--headline3",
"margin": "5px 0 20px 0",
"children": "Nathan K. Joe"
}
},
"text2": {
"kind": "Text",
"props": {
"as": "p",
"margin": "20px 0 5px 0",
"children": "This space is 100% editable. Use it to introduce a team member, describe their work experience and role within the company. This is also a great place to highlight a team member's strong sides."
}
}"name": {
"kind": "Text",
"props": {
"as": "h3",
"font": "--headline3",
"margin": "5px 0 5px 0",
"children": "Name"
}
},
"address": {
"kind": "Text",
"props": {
"as": "p",
"margin": "10px 0 5px 0",
"children": "Home address"
}
},
<Text {...override("address")} children={employee['Home address']} />
<Text {...override("Start date")} children={`Start date: ${employee['Start date']}`} />
<Text {...override("Status")} children={employee['Status']} />
<Text {...override("DOB")} children={`Birth date: ${employee['DOB']}`} />"address": {
"kind": "Text",
"props": {
"as": "p",
"margin": "10px 0 5px 0",
"children": "Home address"
}
},
"Start date": {
"kind": "Text",
"props": {
"as": "p",
"margin": "10px 0 5px 0",
"children": "Start date"
}
},
"Status": {
"kind": "Text",
"props": {
"as": "p",
"margin": "10px 0 5px 0",
"children": "Status"
}
},
"DOB": {
"kind": "Text",
"props": {
"as": "p",
"margin": "10px 0 5px 0",
"children": "Birth date"
}
},
import { Box, Text } from "@quarkly/widgets";import { Box, Text, Link } from "@quarkly/widgets";<Link {...override("Email address")} children={employee['Email address']} href={`mailto:${employee['Email address']}`} />
<Link {...override("Phone")} children={employee['Phone']} href={`tel:${employee['Phone']}`}/>"Email address": {
"kind": "Link",
"props": {
"margin": "10px 0 5px 0",
"color": "--primary",
"text-decoration": "none",
"children": "Email"
}
},
"Phone": {
"kind": "Link",
"props": {
"margin": "10px 0 5px 0",
"color": "--primary",
"text-decoration": "none",
"children": "Phone"
}
},
Финально наш код выглядит так:
import React from "react";
import { useOverrides, Override, StackItem } from "@quarkly/components";
import { Box, Text, Link } from "@quarkly/widgets";
const defaultProps = {
"width": "25%",
"lg-width": "50%",
"sm-width": "100%"
};
const overrides = {
"box": {
"kind": "Box",
"props": {
"height": "0",
"margin": "0 0 20px 0",
"padding-bottom": "100%",
"background-size": "cover",
"background-position": "center",
"background-image": "url(https://images.unsplash.com/photo-1503443207922-dff7d543fd0e?ixlib=rb-1.2.1&ixid=eyJhcHBfaWQiOjEyMDd9&auto=format&fit=crop&w=582&q=80) 50% 0/cover no-repeat"
}
},
"title": {
"kind": "Text",
"props": {
"color": "--grey",
"margin": "0",
"children": "title"
}
},
"name": {
"kind": "Text",
"props": {
"as": "h3",
"font": "--headline3",
"margin": "5px 0 5px 0",
"children": "Name"
}
},
"address": {
"kind": "Text",
"props": {
"as": "p",
"margin": "10px 0 5px 0",
"children": "Home address"
}
},
"Start date": {
"kind": "Text",
"props": {
"as": "p",
"margin": "10px 0 5px 0",
"children": "Start date"
}
},
"Status": {
"kind": "Text",
"props": {
"as": "p",
"margin": "10px 0 5px 0",
"children": "Status"
}
},
"DOB": {
"kind": "Text",
"props": {
"as": "p",
"margin": "10px 0 5px 0",
"children": "Birth date"
}
},
"Email address": {
"kind": "Link",
"props": {
"margin": "10px 0 5px 0",
"color": "--primary",
"text-decoration": "none",
"children": "Email"
}
},
"Phone": {
"kind": "Link",
"props": {
"margin": "10px 0 5px 0",
"color": "--primary",
"text-decoration": "none",
"children": "Phone"
}
},
};
const EmployeeCard = props => {
const {
override,
children,
rest
} = useOverrides(props, overrides, defaultProps);
const { employee = {} } = rest;
return <StackItem {...rest}>
<Override slot="StackItemContent" flex-direction="column" />
<Box {...override("box")} background-image={`url(${employee.Photo[0].url})`}/>
<Text {...override("title")} children={employee.Title} />
<Text {...override("name")} children={employee.Name} />
<Text {...override("address")} children={employee['Home address']} />
<Text {...override("Start date")} children={`Start date: ${employee['Start date']}`} />
<Text {...override("Status")} children={employee['Status']} />
<Text {...override("DOB")} children={`Birth date: ${employee['DOB']}`} />
<Link {...override("Email address")} children={employee['Email address']} href={`mailto:${employee['Email address']}`} />
<Link {...override("Phone")} children={employee['Phone']} href={`tel:${employee['Phone']}`}/>
{children}
</StackItem>;
};
Object.assign(EmployeeCard, { ...StackItem,
defaultProps,
overrides
});
export default EmployeeCard;

Ждем несколько минут и проверяем: https://keen-varahamihira-c54ae1.netlify.app/
Для проверки синхронизации меняем данные в базе:
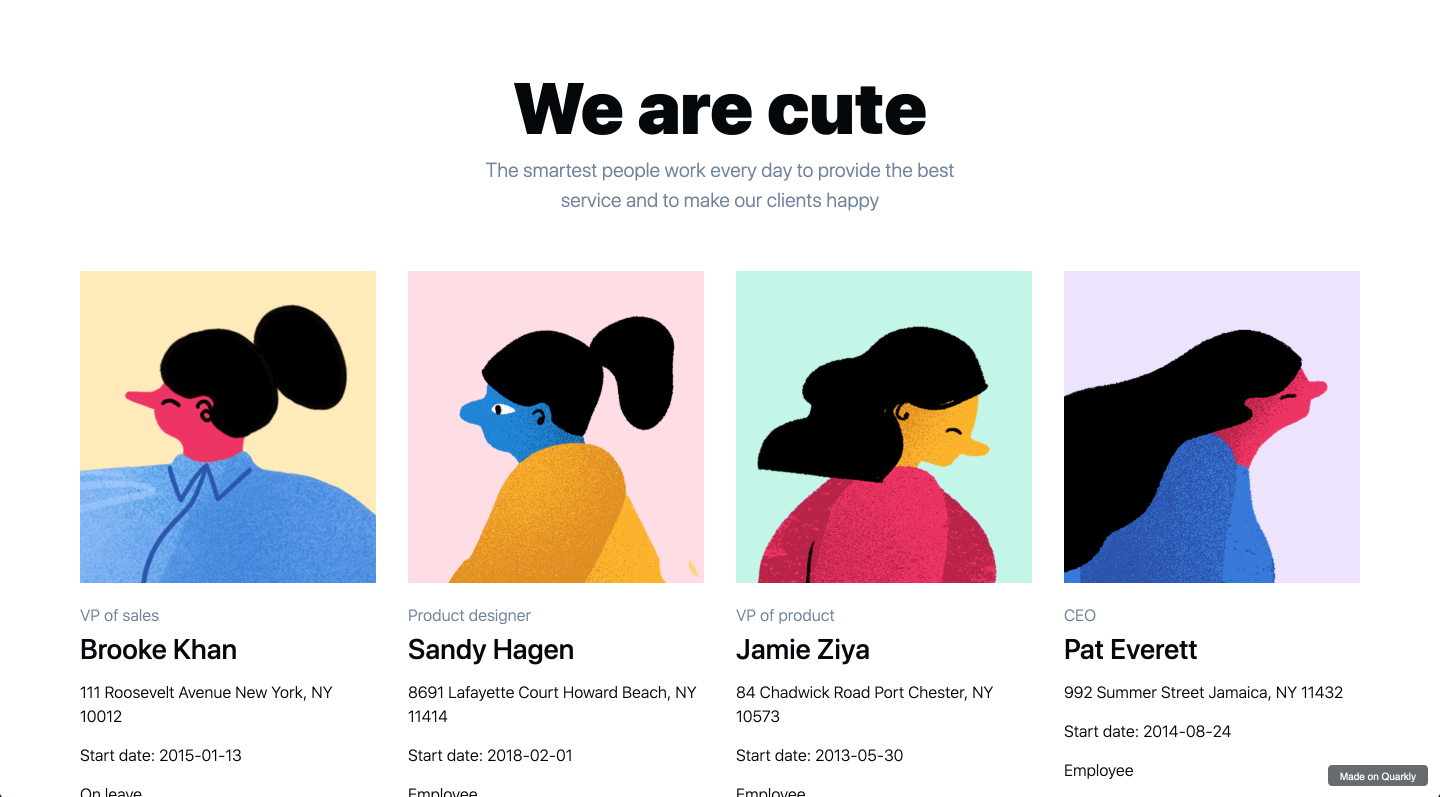
Теперь они появятся в приложении:

В дальнейшем мы можем как угодно стилизовать наши элементы с карточками, не нарушая настроенный импорт из Airtable. Пример можно посмотреть здесь.
Репозиторий на GitHub: https://github.com/quarkly-dev/Getting-data-from-Airtable-tutorial
Спасибо за внимание!
Если у вас остались вопросы — не стесняйтесь задавать их в комментариях. В следующем уроке рассмотрим ещё один пример работы с данными, покажем как интерактивно их визуализировать, дав возможность пользователю менять фильтры прямо в приложении.